UART, uBoot, u root
Getting a root shell on the D-Link DCS-5222 by manipulating uBoot parameters via UART
23. August 2022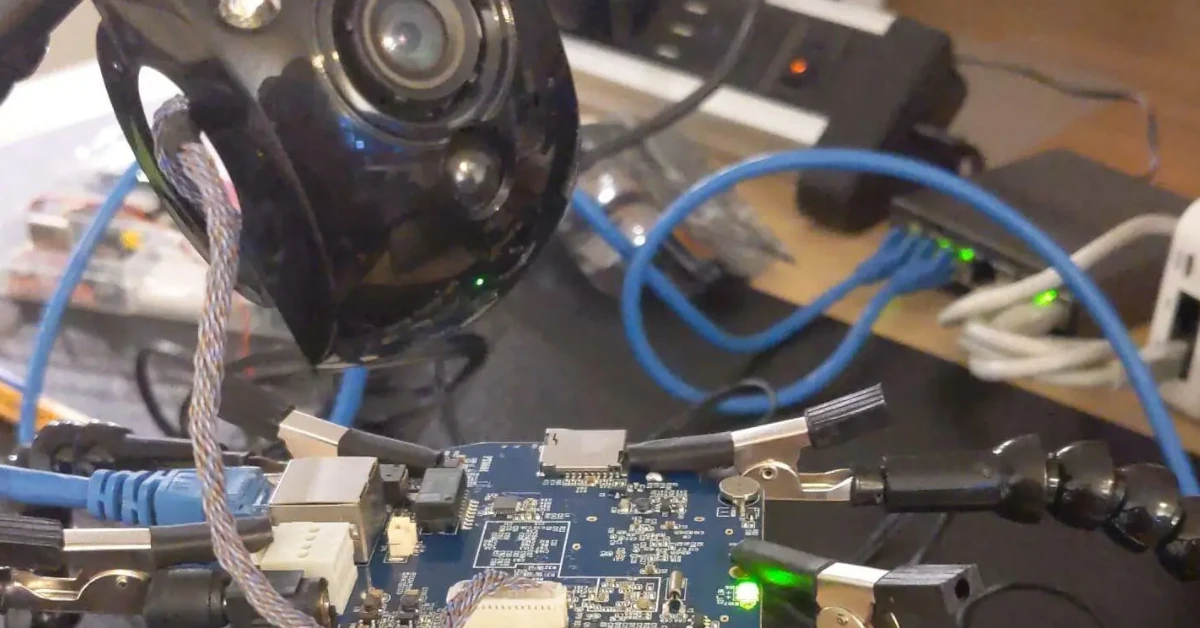
All the cheap devices that I’ve gotten my hands on since I started getting into hardware hacking had basically no protection. So after getting my hands on the D-Link DCS-5222L, playing with it, pwning it, and breaking it, I wanted to write this blog post to reflex on what I learned. This is written in chronological order of what I did first to last.
Checking out the Firmware
After downloading the firmware from files.dlink.com.au/products↗, I checked out what type of file it is by running file firmware.bin.
[~/dlink]$ file update_DCS-5211L_DCS-5222L_1.14_5601.bin
update_DCS-5211L_DCS-5222L_1.14_5601.bin: POSIX shell script executable (binary data)
This gave me slight hope that the firmware is not encrypted, but a shell script is also rather weird as firmware for an IoT device. So I ran the trusty binwalk.
[~/dlink]$ binwalk update_DCS-5211L_DCS-5222L_1.14_5601.bin

DECIMAL       HEXADECIMAL     DESCRIPTION
--------------------------------------------------------------------------------
0             0x0             Executable script, shebang: "/bin/sh"
1863          0x747           Unix path: /etc/rc.d/init.d/services.sh stop > /dev/null 2> /dev/null
1941          0x795           Unix path: /etc/rc.d/init.d/services.sh start > /dev/null 2> /dev/null && exit 1; }
28820         0x7094          Linux kernel ARM boot executable zImage (big-endian)
12587800      0xC01318        CramFS filesystem, little endian, size: 192512, version 2, sorted_dirs, CRC 0x092E2C10, edition 0, 95 blocks, 19 files
This looked like a not encrypted firmware for an ARM device, so I unpacked it with binwalk -e. It found a CramFS filesystem that contained the following files:
[~/dlink/extracted/cramfs-root]$ find . -type f
./._dcp
./mydlink-watch-dog.sh
./._mydlink-watch-dog.sh
./opt.local
./._signalc
./._upgradefw
./._upnpc-ddns
./._version
./._httpd_check
./signalc
./upnpc-ddns
./dcp
./httpd_check
./tsa
./version
./._tsa
./upgradefw
./._opt.local
All those files together don’t seem like a complete firmware. There does not seem to be a Linux file system present. I then took a look at the bash script portion of the firmware. The script was extracted by viewing the firmware in a hex editor and determining that the script finishes at line 118.
[~/dlink]$ head -n 118 update_DCS-5211L_DCS-5222L_1.14_5601.bin > update.sh
The script itself did not look that interesting. But right after the script (lines 121-534) was some base64 encoded data. I extracted it and based on line 120 it appears to be the dd utility.
[~/dlink]$ file b64decoded
b64decoded: ELF 32-bit LSB executable, ARM, EABI5 version 1 (SYSV), dynamically linked, interpreter /lib/ld-linux.so.3, for GNU/Linux 2.6.28, stripped
I was hoping for an easy win with the firmware. But at this point, the camera arrived, so I looked at the hardware instead.
Screwing Around
As soon as the device arrived, I opened it up and started looking for serial interface pins. Lucky for me D-Link nicely labeled the four pins with a UART branding.
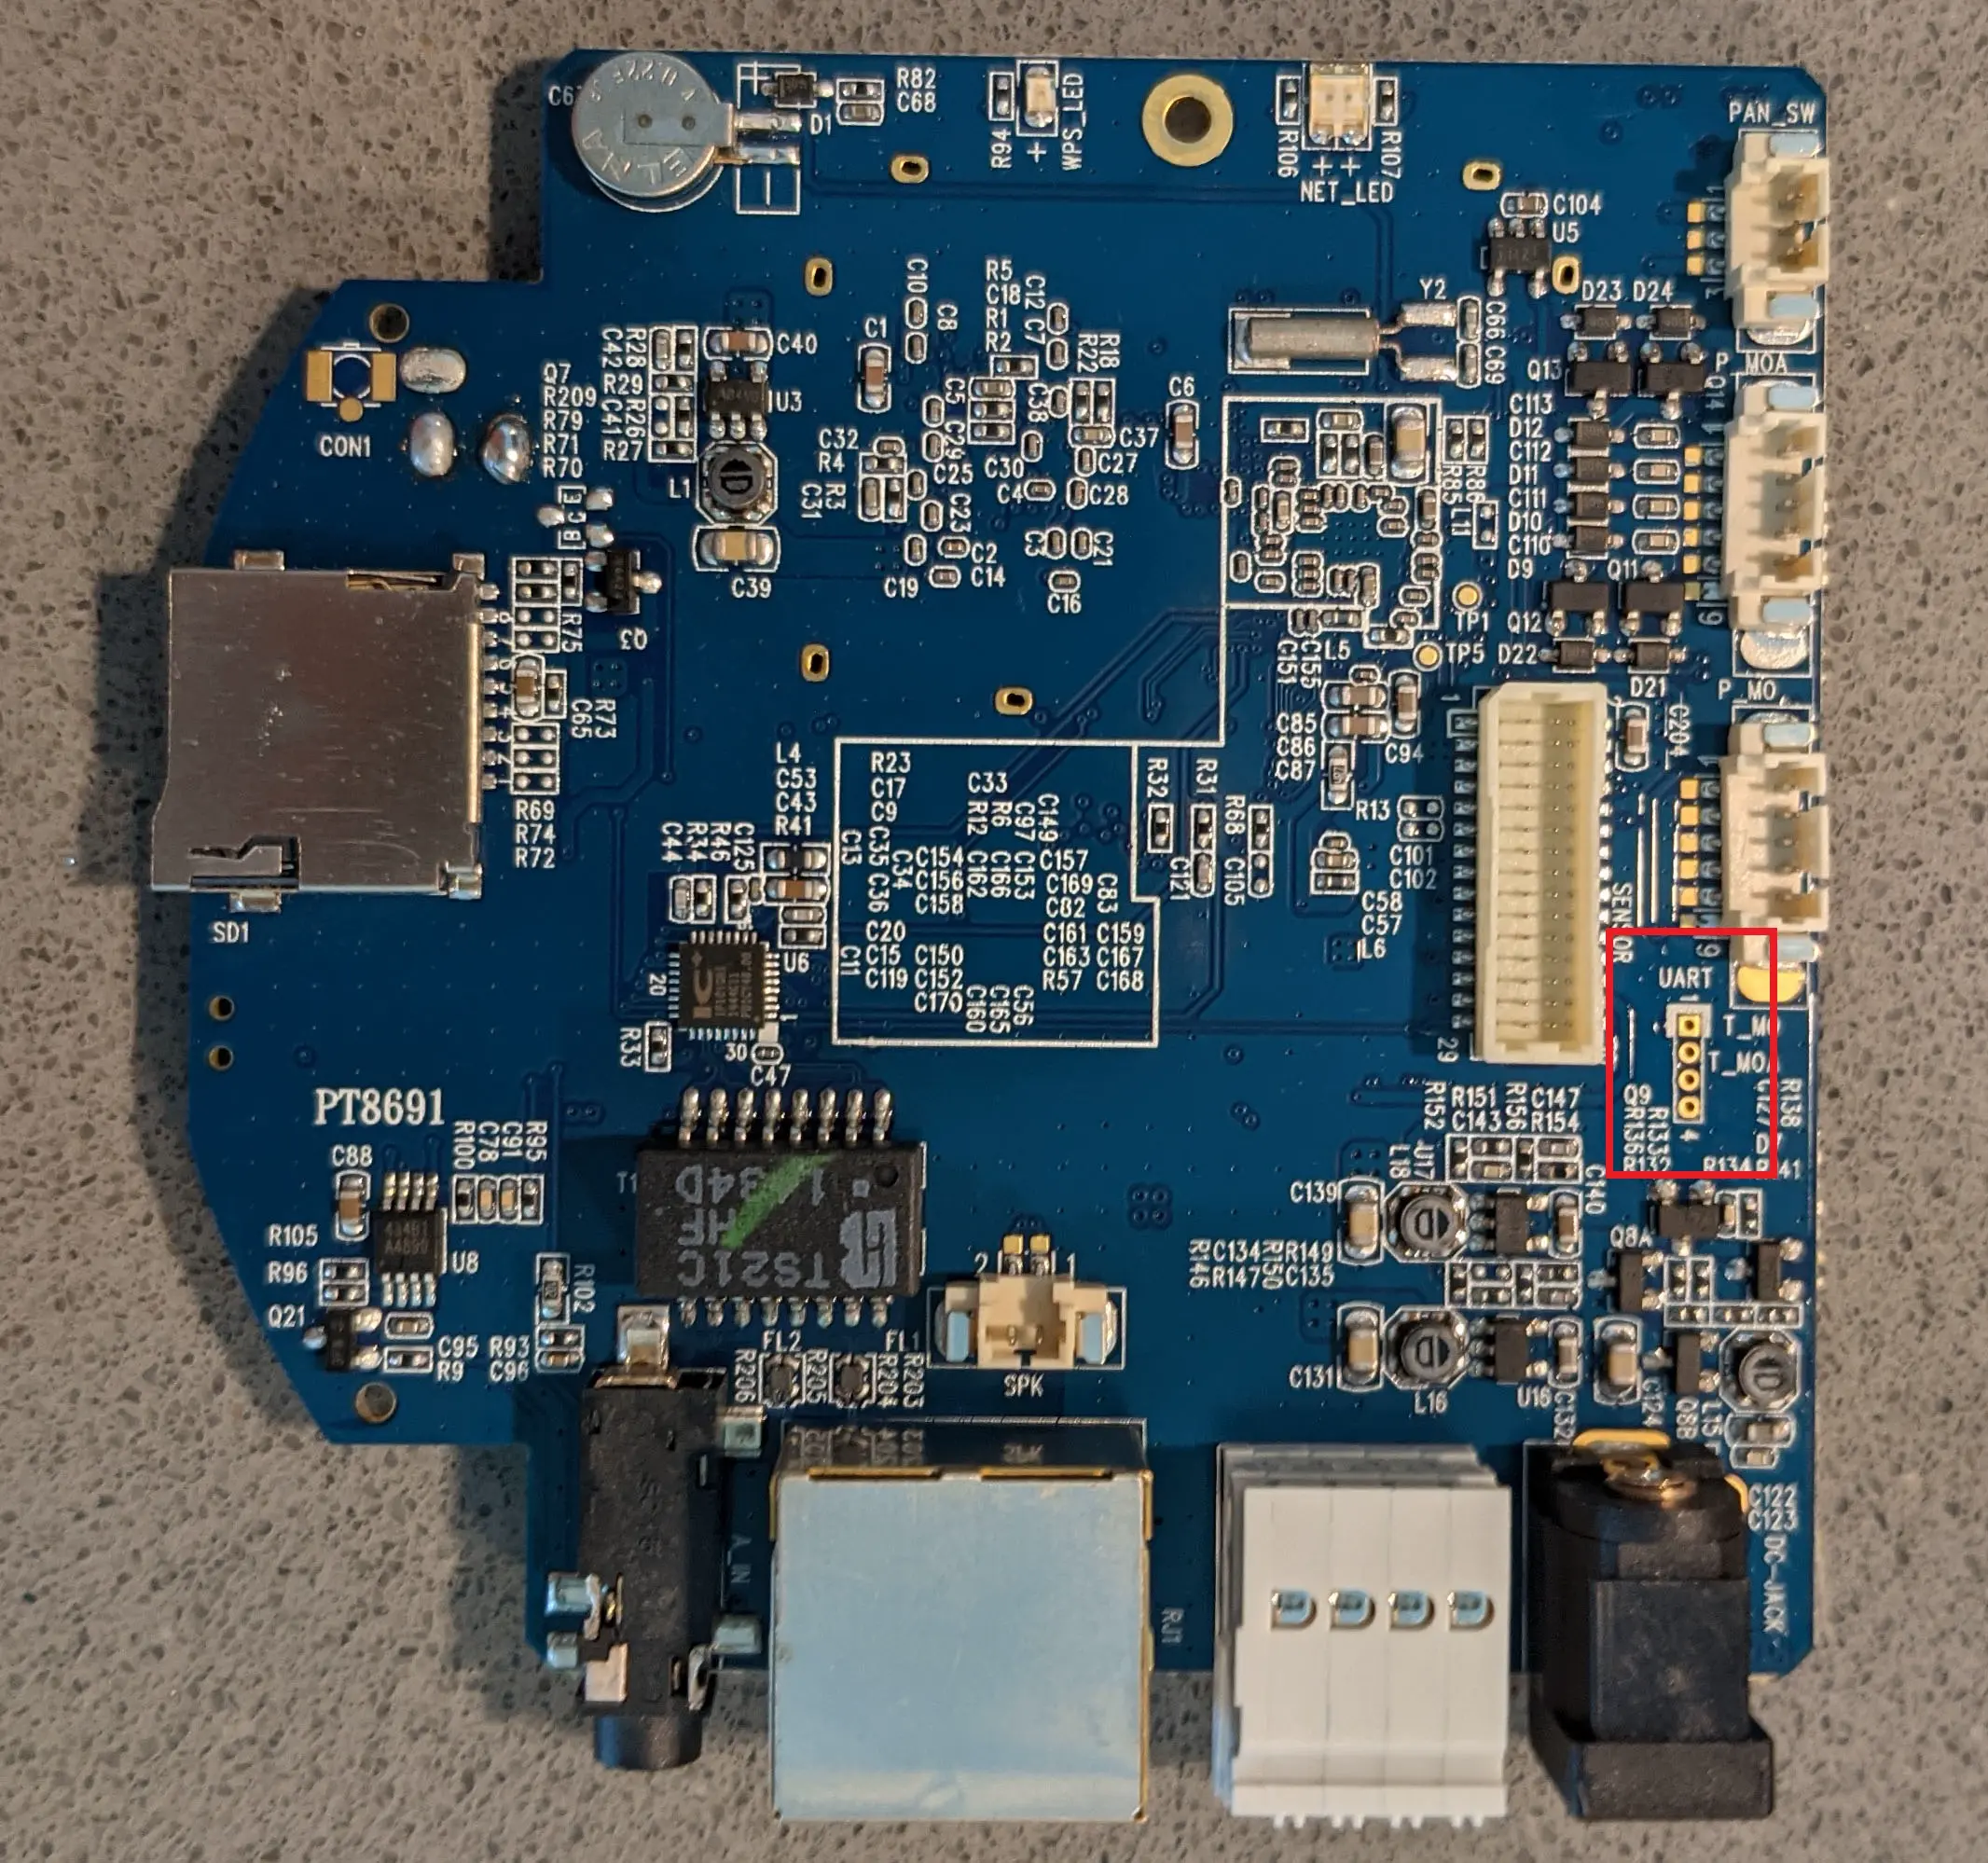
Almost every time if the pins are not labeled, the top and bottom ones will be VSS and GND and the middle ones will be TX and RX. I simply enumerated GND by using a multimeter in “continuity testing” aka. “beep” mode. The multimeter beeps, if there is an electrical connection between the two probes. So you hold one probe onto the top or bottom UART pin and the other one to a known ground contact. This can be the ground of a USB port, the metal shielding on components, or the “golden ring” around screws. Sometimes it can also be the ground pin of the power supply. But this depends on the type of power supply and is generally not a safe bet.
With two of the four pins identified, soldering was next. In this case, soldering was my only option since I did not have enough space for pins and I did not have the correct pin size in the first place. For soldering, I used some 26 AWG wire.
After soldering, I did some tests to make sure that the camera was still functional. I then removed all parts from the camera that were not needed for it to operate. This was done to save space on my desk. Thru trial and error, I was able to remove everything but the main PCB as well as the camera PCB with its attached motor. The other two motors, their sensors, the speaker, and the WI-FI antennas were removed.
Connecting via UART
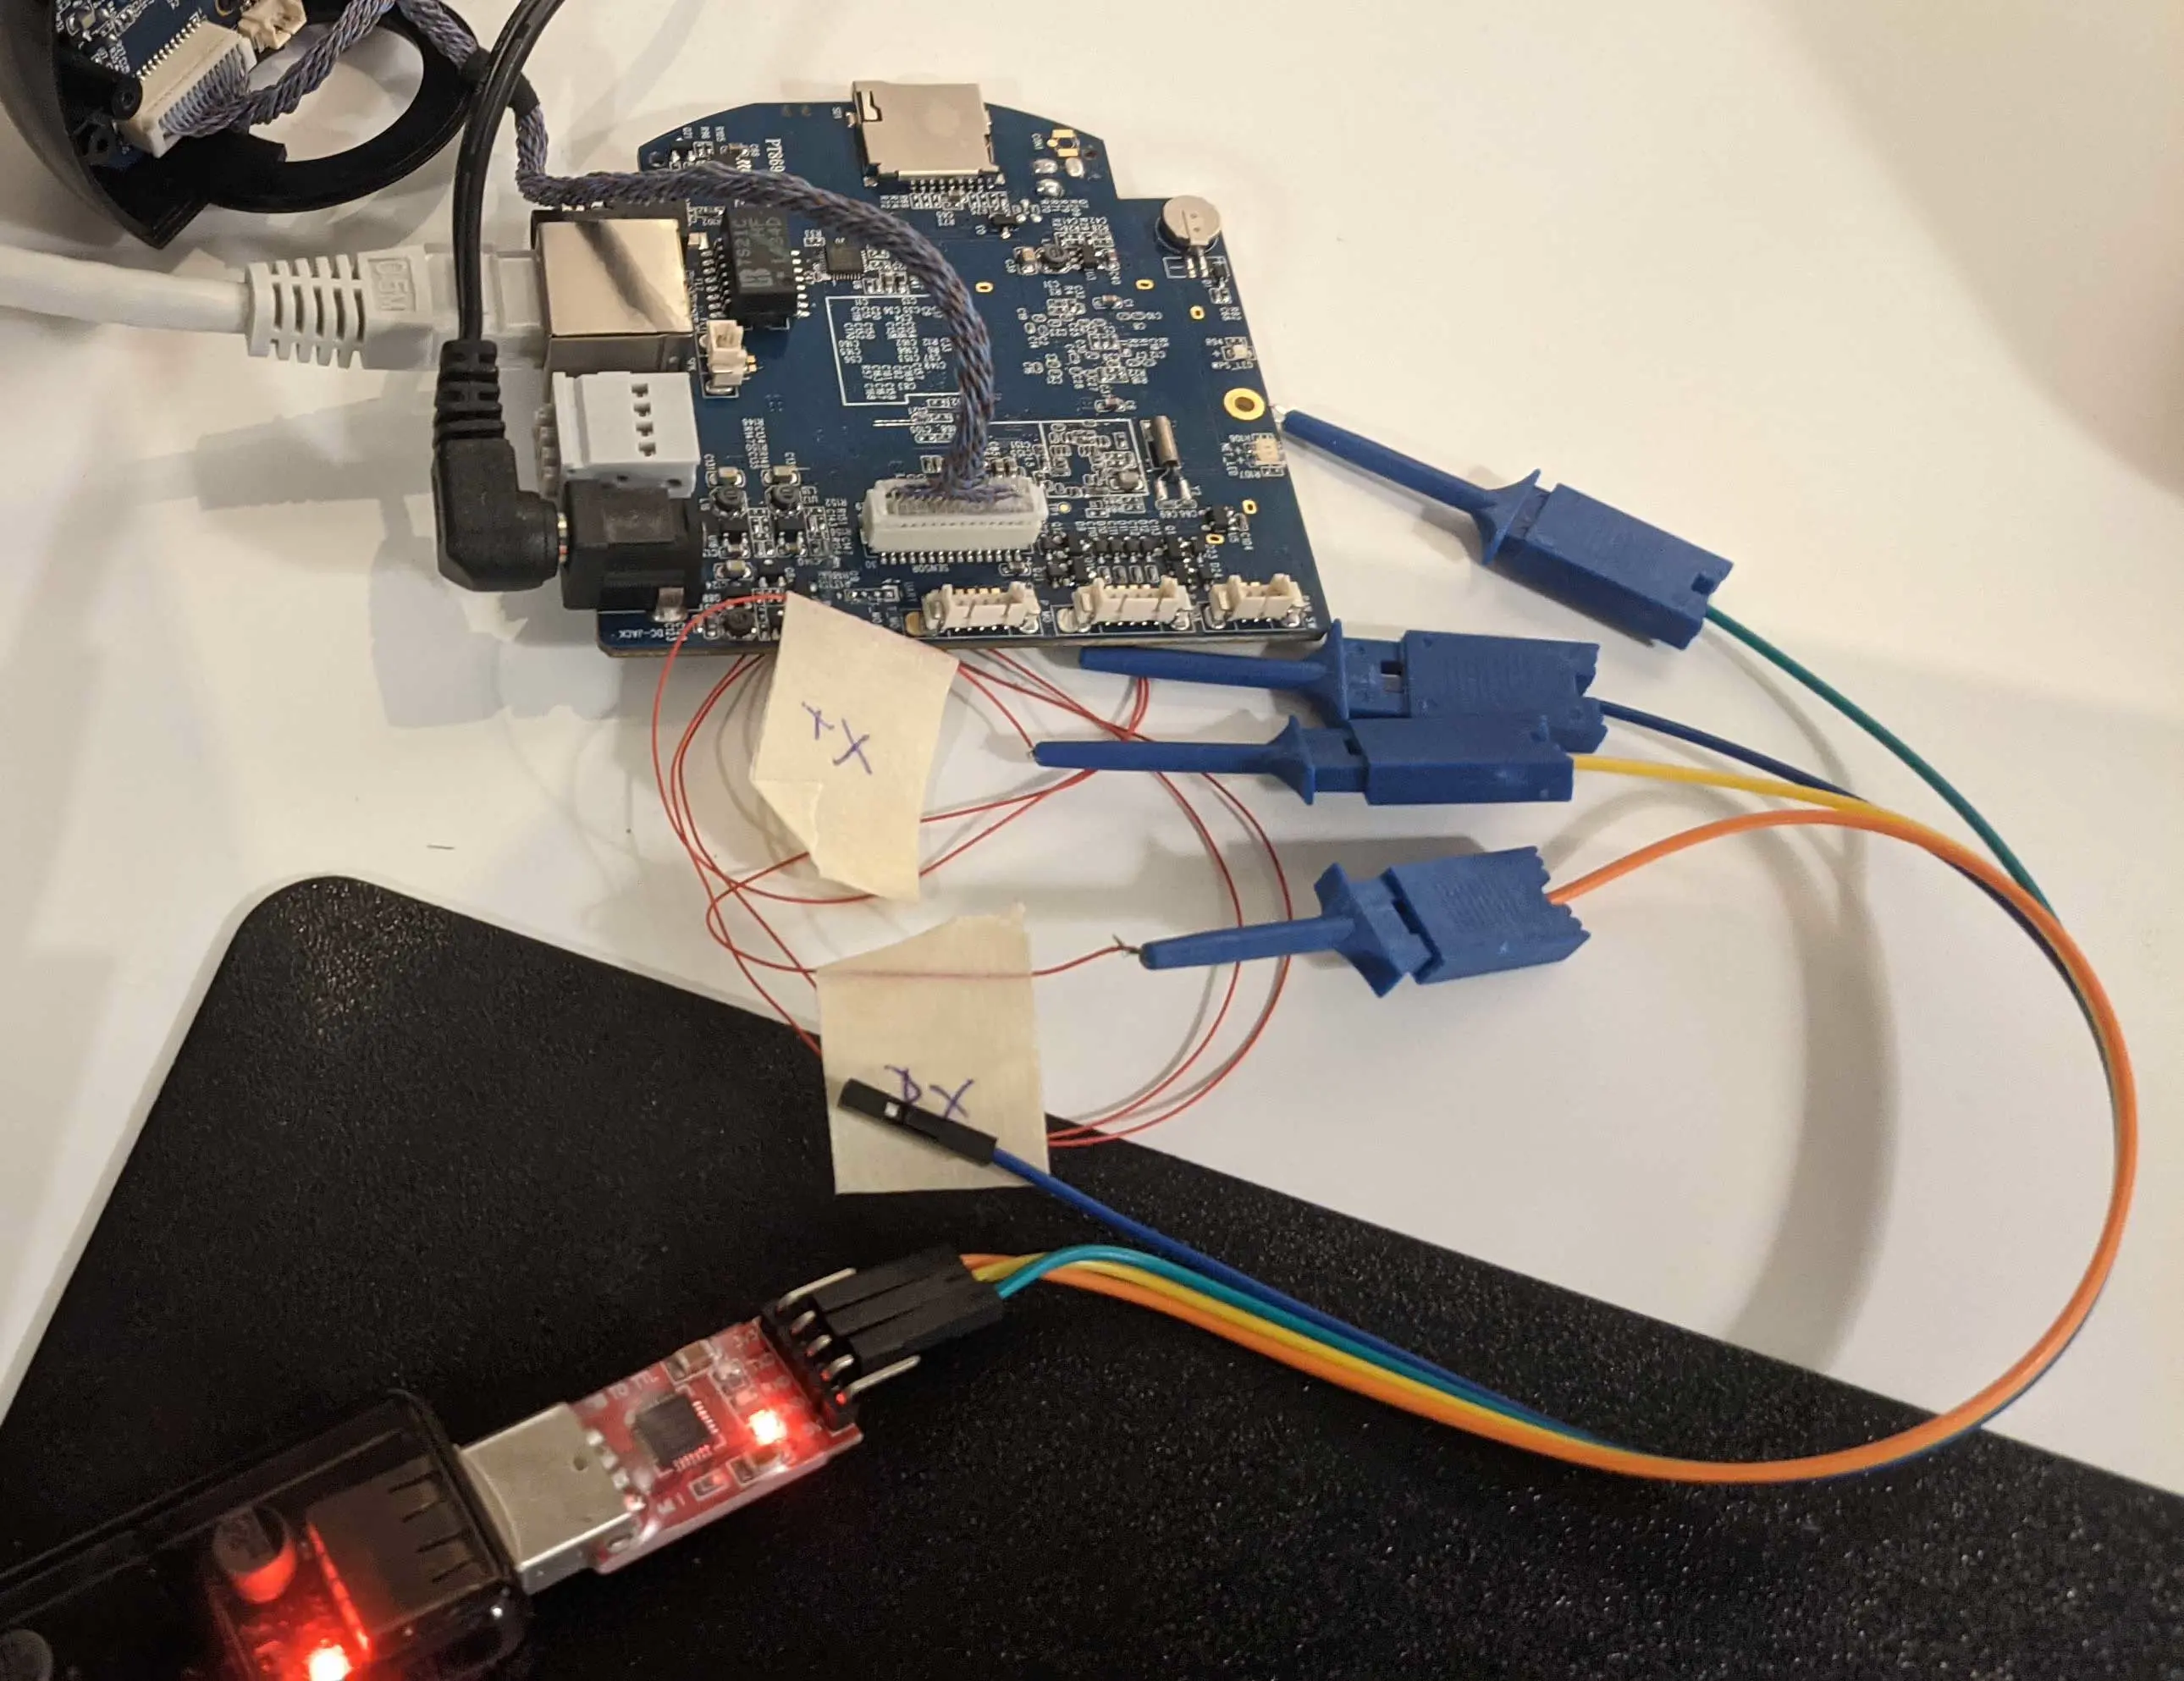
To connect via UART I used a CP210x USB to UART adapter as well as one of those cheap ‘24M 8CH’ logic analyzers. I first connected both soldered cables to channels on the logic analyzer. Upon starting the Saleae Logic 2↗ software as well as powering the camera on I got some gibberish text on one channel inside Logic 2. With that, the TX pin was identified.
As a next step, I needed to identify the baud rate. I did this by simply guessing and trying from a know list of values. The correct value was 115200. On devices that do not use a common baud rate, you can use Logic 2 and measure the timing of the incoming gibberish text.
Upon connecting the right cables to the right pins on the CP210x I started the connection putty. The boot log showed up perfectly in the terminal.
I used putty to connect to the USB serial adapter:
[~/dlink]$ putty -serial /dev/ttyUSB0 -sercfg 115200 -log uart.log

U-Boot 2010.06 (Oct 08 2013 - 14:12:52)

DRAM:  128 MiB
Check spi flash controller v350... Found
Spi(cs1) ID: 0xC2 0x20 0x19 0xC2 0x20 0x19
Spi(cs1): Block:64KB Chip:32MB Name:"MX25L25635E/735E/635F"
In:    serial
Out:   serial
Err:   serial
Hit any key to stop autoboot:  0
32768 KiB hi_sfc at 0:0 is now current device

## Booting kernel from Legacy Image at 82000000 ...
   Image Name:   Linux-3.0.8
   Image Type:   ARM Linux Kernel Image (uncompressed)
   Data Size:    1488100 Bytes = 1.4 MiB
   Load Address: 80008000
   Entry Point:  80008000
   Loading Kernel Image ... OK
OK

...

Welcome to ApproRootFileSystem
After the device finished booting, I noticed however that I was able to interact with the device. It took me a couple of minutes, but I noticed that the GND from the CP210x and the camera were not properly connected. Upon fixing that and pressing ENTER a couple of times I was presented with a login shell. By hand, I tried a bunch of classic combinations but had no luck. I also could not find any credentials online. For some reason, I thought that the best idea was to code a login brute-forcer via UART. I can confidently say that this was a stupid idea. After fighting two days with newlines, carriage returns, and text detection I gave up and put this project to the side for about a month.
Back to U-Boot
I skipped U-Boot before but after the break I felt like looking into it was worth a shot. Based on the line Hit any key to stop autoboot: I smashed ENTER right after powering on the device and was dropped into the U-Boot shell:
At this point, I needed to know what shell would be on the camera to set the boot arguments correctly. Most of the time /bin/bash is not available on IoT devices. I’ve encountered /bin/ash as well as /bin/sh in the past. They are usually symlinks to a busybox↗ binary that the manufacturer compiled themselves with only the minimum of modules needed. For the first try, I choose /bin/sh.
Using the commands printenv as well as fatinfo I got some information regarding the filesystem and memory layout. This gave me the following command chain which I entered into the U-Boot shell:
# sets the bootargs, saves them and then resets the camera
setenv bootargs mem=128M console=ttyAMA0,115200 root=/dev/mtdblock4 ro rootfstype=jffs2 init=/bin/sh; saveenv; reset
The camera booted and gave me a root shell.
Hashcat to the Rescue
The root shell itself kicked me out every 60s since some watchdog kicked in. The easiest path forward was getting the user accounts and cracking their passwords. At first, I tried the trusty rockyou.txt↗ as well as asking the internet, but I had no luck with both. Since the encryption (DES) on those passwords was not that strong I’d figured that my GPU probably could do up to 8 characters pretty quickly.
To brute force the root hash eRgTKCCvNAte. I used hashcat with the following command:
[~/dlink]$ hashcat FILE -m 1500 -a 3 -O -w 4 -i -1 abcdefghijklmnopqrstuvwxyzABCDEFGHIJKLMNOPQRSTUVWXYZ0123456789 ?1?1?1?1?1?1?1?1

# -m 1500 = mode: crack descrypt, DES (Unix), Traditional DES
# -a 3 = attack mode: Brute-force
# -O = Enable optimized kernels
# -w 4 = max speed
# -i = iterate (try 1 to max. chars definded by mask, instead of only max. chars)
# -1 xxx = defines charset 1 with possible chars a-zA-Z0-9
# ?1?1?1?1?1?1?1?1 = use charset 1 8 times
This gave me the root password of hi3518c in about 15 min. (This is actually the name of the processor used inside this camera)
Since the camera still boots to my custom set shell, I needed to put the default boot arguments back. Upon spamming ENTER again while the device powers on, I was able to enter the following command to get back to the default shell:
setenv bootargs mem=128M console=ttyAMA0,115200 root=/dev/mtdblock4 ro rootfstype=jffs2; saveenv; sf probe 0; sf read 0x82000000 $(loadbootaddr) $(loadbootsize);go 0x820000000
I got some of the information for this command chain from Synack’s DEF CON 23 talk↗. After waiting for the boot to finish, I was back at the default /bin/ash login prompt for which I now knew the password this time.
Welcome to ApproRootFileSystem

dlinkcamEEFE login: root
Password: hi3518c

root@ /root#
Dumping the Filesystem
My next goal was to dump the filesystem. For this, I needed a way to copy files off the device. The easiest way to do this would be scp. This requires an SSH server with a sFTP submodule running on the device. Upon finding /etc/sshd I started the daemon with /usr/sbin/sshd -Dd. Before connecting I took a look at the configuration in /etc/ssh/sshd_config and noticed that the SSH port was 8992.
I connected a computer with a static IP of 192.168.0.21 to the LAN port of the camera and tried logging in with ssh root@192.168.0.20 -p 8992 but got the error:
Unable to negotiate with 192.168.0.20 port 8992: no matching host key type found. Their offer: ssh-rsa,ssh-rsa
This was likely due to the age of the sshd binary. To get around this error, set the key type to something old on the connecting host with:
[~/dlink]$ ssh root@192.168.0.20 -p 8992 -o HostKeyAlgorithms=ssh-rsa
But upon entering the correct password the session would immediately terminate with Connection reset by 192.168.0.20 port 8992.
Since I started the daemon on the camera in debug mode, I saw what caused the error:
debug1: kex: algorithm: ecdh-sha2-nistp256
debug1: kex: host key algorithm: ssh-rsa
debug1: kex: server->client cipher: aes128-gcm@openssh.com MAC: <implicit> compression: none
debug1: kex: client->server cipher: aes128-gcm@openssh.com MAC: <implicit> compression: none
debug1: kex: ecdh-sha2-nistp256 need=16 dh_need=16
debug1: kex: ecdh-sha2-nistp256 need=16 dh_need=16
debug1: expecting SSH2_MSG_KEX_ECDH_REPLY
After a quick online search, I added the -o Ciphers=3des-cbc to fix the cipher to 3des in CBC mode. This would finally let me log in via SSH with:
[~/dlink]$ ssh root@192.168.0.20 -p 8992 -o HostKeyAlgorithms=ssh-rsa -o Ciphers=3des-cbc
Got sFTP?
Upon trying to scp the whole camera I noticed that there was no sFTP submodule present on the device. This means that scp is not an option. After viewing the built-in commands for the busybox binary with list it seemed that there was also no FTP module present - busybox was compiled without FTP.
To get FTP connectivity to the device I uploaded a full busybox binary. The version on the device was 1.20.2 so the version chosen was the closest one with 1.20.0 (armv4l). Since this busybox binary had all modules in it, I started an FTP daemon with:
busybox tcpsvc -vE 0.0.0.0 21 ./busybox ftpd /
A bit of bash enabled me to then dump the filesystem:
[~/dlink]$ cat folders.txt
bin etc home lib linuxrc mnt modules mydlink opt root sbin tmp usr var

[~/dlink]$ for i in $(cat folders.txt); do wget -r ftp://ANONYMOUS@192.168.0.20/$i; done
Honey, I Broke the Camera
With the filesystem dumped I looked at the firmware upgrade process to possibly smuggle a reverse shell into the upgrade. However, during this, I bricked the device, and it got stuck in a boot loop. With no “full image”, I could not restore the device from the U-Boot shell. And with that, this story ends.
I’m happy with what I achieved even if in the end I bricked the camera. I’ve gotten enough learning value out of it that I can say the 30 bucks were a pretty good investment. If you want to get started, pick something a bit older and probably outdated. Grab the low-hanging fruits first and don’t set a CVE as your main goal.